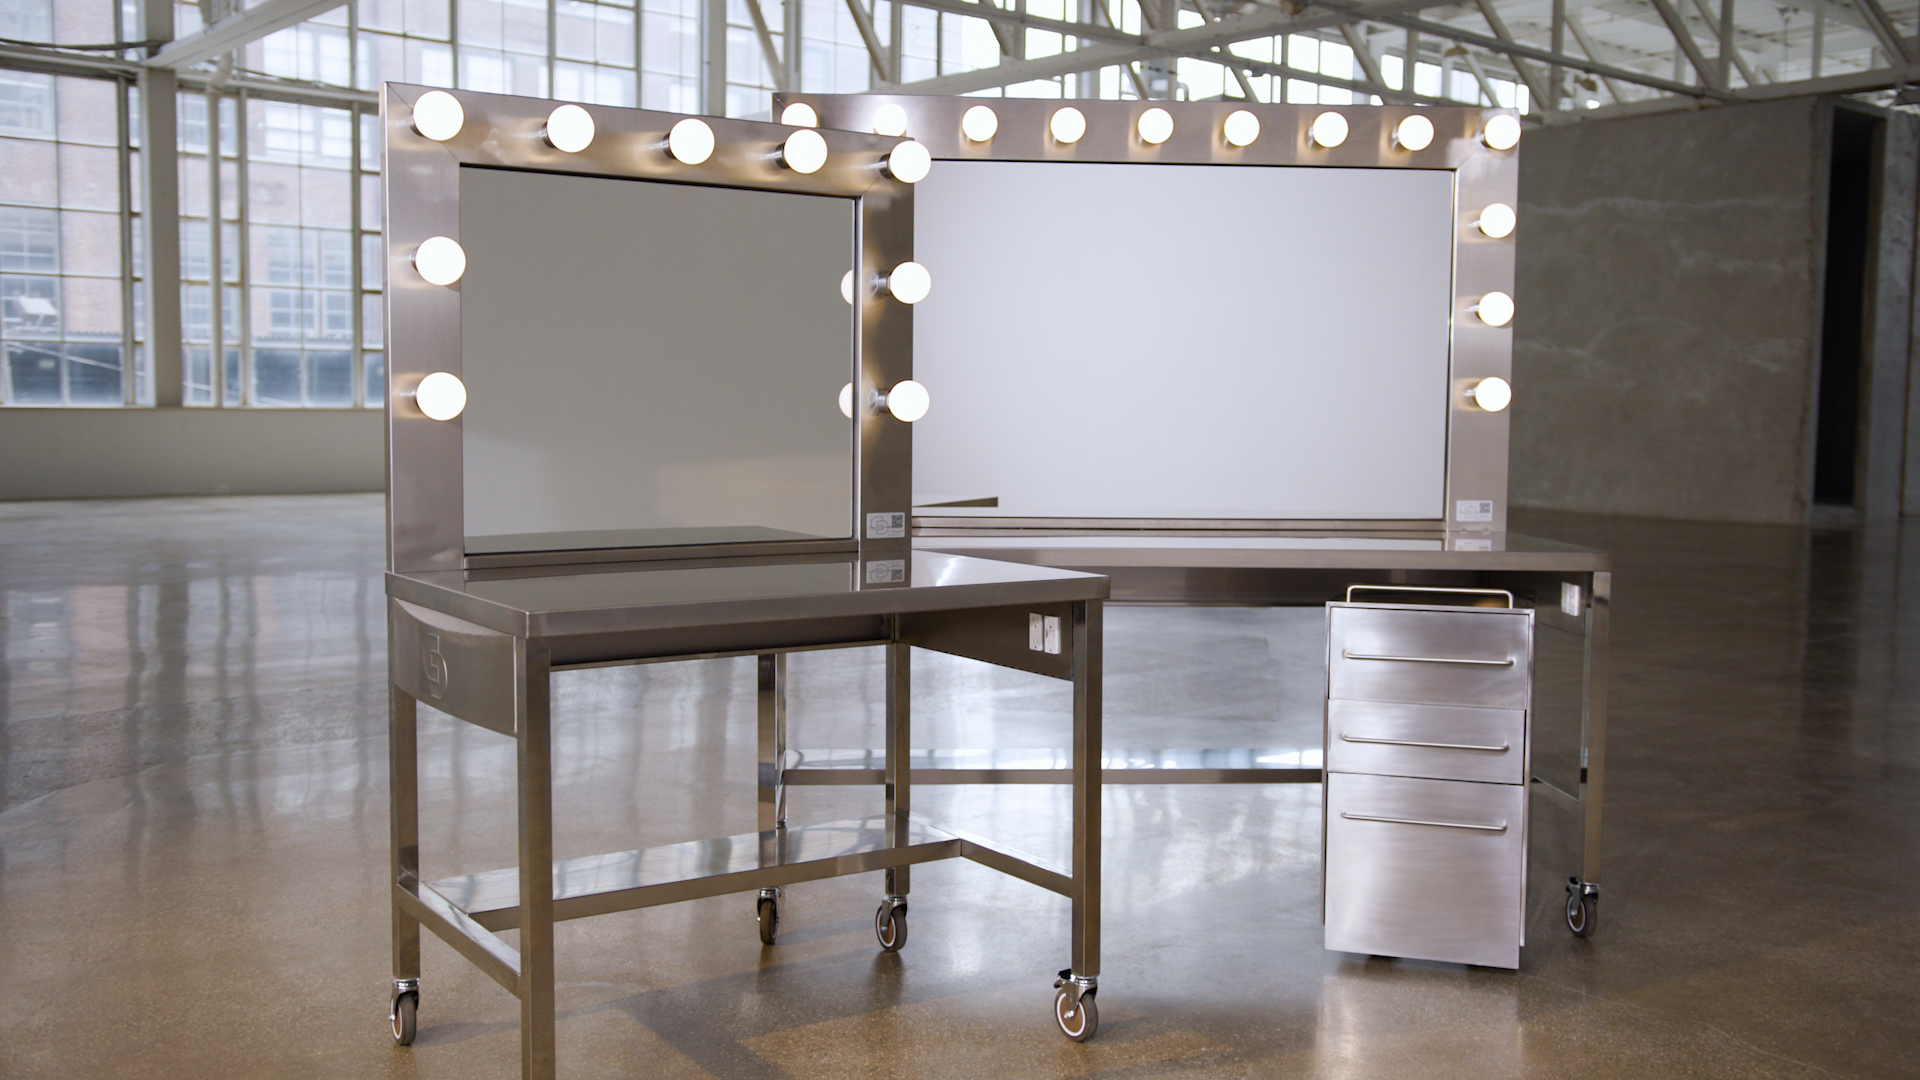

ASSEMBLY INSTRUCTIONS
Directions for installation
Before assembling your station, preparation needs to be met before assembly can begin. The stainless steel parts may have sharp edges so utility gloves are recommended to protect your hands. When unpacking each of the parts, the protective film needs to be removed. The tools you will need to assemble your station is a adjustable wrench, ratchet with 13mm socket, screwdriver with #4 philips tip, utility knife and the 17mm wrench supplied with your station.
Step 1: Attach the lower 10” shelf to each side of the leg assembly. Please note the orientation of the shelf so that the back edge of the shelf aligns with the front of the rear leg.
Step 2: Rotate the station so the legs are facing up. Install the casters into the leg assembly, be sure they are tight and there is no movement in the leg assembly.. DO NOT put the locking casters on the rear legs under the mirror assembly. Locked casters under the mirror assembly will cause the station to possibly tip over! Locking casters should be mounted on the legs closest to the switch and dimmer.
Step 3: Lift the station onto its casters and attach the table top to the top of the leg assembly. Secure the table top with the 2 bolts with washers on the inside top of the front of the leg assembly.
Step 4: Attach the mirror assembly to the station by first guiding each of the wiring harnesses into the round hole in the each side of the table top then install the mirror assembly post into the hole. Obtain the 4 -13mm washers and nuts and tighten the mirror assembly to the station top from the underside of the station. Please note the station will still feel unstable at this point until we add the cross support so always be aware and have a hand on the station.
Step 5: see wiring video
Step 6: Attach the 6” upper cross support to the back of the station under the mirror assembly with 4-13mm bolts and washers. Now the station should feel solid and you're ready to make the electrical connection.
Making the Electrical Connection
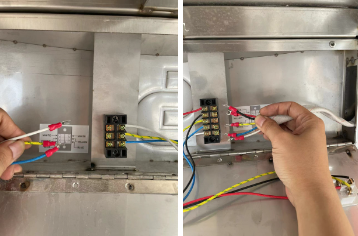
Step 1: Open the access panels on each side of the leg assembly by removing the 3 screws across the top of the inside of each side of the leg assembly. Carefully pull the wire harness from the back of the leg assembly through the hole provided on each side of the leg assembly. With a utility knife on the right side of the station (the non switch side) carefully cut the black plastic sheeting off the wire ends to expose the fork foot connector on each of the wires. Next remove the clear plastic cover on the connection block by wiggling it off (it's only held on with pressure).Connect each of the colored wires across from its corresponding wire by inserting the fork foot of each of the wires under the corresponding pressure plate of the electrical block (there is a wiring schematic sticker next to each of the connection block). Close the right side access panel and repeat the process on the left side of the station( here you will have 2 extra wires to connect). Once all of the connections are made here we can now install all of the E27 LED bulbs to the mirror assembly. Before we close the access panel on the left side we can plug the station in and test to be sure everything is working correctly.
Please note: Once the station is plugged in and the lights are turned on but the bulbs do not light press the reset switch on the outlet next to the dimmer. If the lights do not dim we can unscrew the dimmer and rotate the wheel next to the dimmer control counter clockwise until the desired level of dimming is achieved. Reattach the dimmer and close the access panels on each side and your station is now ready to be used. If you have any questions or are unsure of anything please let us know and we will help you in the assembly of your station.